Friday, December 12, 2008

Adobe lightroom 2 FAQ


What is Adobe Photoshop Lightroom 2?
Adobe® Photoshop® Lightroom® 2 software is designed specifically for professional and advanced amateur photographers. It is an efficient, powerful way to import, process, manage, and showcase large volumes of digital photographs. Lightroom enables you to spend less time sorting and organizing images, so you have more time to actually shoot and perfect them.
Who uses Photoshop Lightroom 2?
First and foremost, Photoshop Lightroom 2 is a product for serious photographers, especially those who work with large volumes of digital images. These include fashion and portrait photographers; photojournalists; and wedding, landscape, and commercial photographers as well as passionate amateur photographers who aspire to achieve the same results as the pros and who demand the same level of quality in their tools. Lightroom is also used by educators and students, as the next generation of professional photographers hone their skills in the classroom.
What's new in Photoshop Lightroom 2?
Photoshop Lightroom 2 offers a host of enhancements to help manage, process, and showcase your photos more easily than ever before. Make more accurate enhancements by targeting a specific area of a photo for dodging and burning. Instantly find photos faster using the information most relevant to your workflow. Multiple monitor support enables you to configure your workspace to manage image workflow and presentation more efficiently. Work even more smoothly with Adobe Photoshop CS4 software (sold separately), switching with a single click to perform pixel-level editing. Quickly arrange a photo for printing multiple sizes on one or many pages with more flexible templates. And take advantage of third-party plug-ins to help you quickly and easily transfer images to popular photo-sharing sites.
What file formats does Photoshop Lightroom 2 support?
Photoshop Lightroom supports more than 190 native camera raw file formats, in addition to DNG, TIFF, and JPEG files — in other words, the formats primarily used in digital cameras. In addition, Photoshop Lightroom 2 also supports the Photoshop PSD file format for enhanced integration with Photoshop CS4. For a complete list of manufacturers and models supported in Camera Raw, see
www.adobe.com/products/photoshop/cameraraw.html.
Is Photoshop Lightroom 2 a photo-editing tool or a workflow productivity tool?
Photoshop Lightroom 2 provides a single environment that has all of the functions photographers most commonly need to perform on their images, in the cleanest, least cluttered, easiest to use package. Lightroom contains a focused set of features that are intuitive, powerful, and easy to learn. It is an image-editing tool and a workflow productivity tool. Photographers who require extensive painting and compositing tools and need to edit their images at the pixel level will still use Photoshop CS4 to achieve their additional goals.
How does Photoshop Lightroom 2 differ from Adobe Photoshop CS4?
Adobe Photoshop CS4 software is the industry standard in digital image editing. Photoshop holds an important place in the pro photographer's toolbox, for detailed pixel-level editing and compositing, but photographers face a variety of workflow concerns beyond image editing. Lightroom 2 addresses these needs in a photographer-centric way. Each module in Lightroom is dedicated to an essential photographic task — use the Library for importing and managing photos; the Develop module for fundamental photographic adjustments and processing hundreds of photographs at a time; and the Slideshow, Web, and Print modules to easily present photos onscreen, online, or in print. Lightroom also goes further, enabling you to manage raw files, even if they are offline, with automatic importing from the folder on your computer used for tethered shooting.
Lightroom excels at processing large volumes of photographs, creating the perfect negative, and outputting collections to the web, print, and slide shows. Photoshop remains the ultimate pixel-level, individual image-editing, and compositing application. Together, Lightroom and Photoshop are the comprehensive software duo for post-processing and editing of digital imagery.
For example, you may have 2,000 photographs and need to quickly preview, sort and rate them, embed your copyright on each, correct white balance, change tonal and color values, and make monochrome copies (or add a wide array of other special effects). Then, you need to output to a slide show, print, or the web, and all under the pressure of time constraints. For this common type of photographic workflow, Lightroom is the ideal solution.
Now perhaps some of your photographs are destined for an advertising layout. After choosing the best images, you may need to add a special effect to a model's eyes or change the pattern of a dress or pull the model completely away from her background to create an intricate, multilayered composite. For this, Photoshop is the ideal solution.
How does Lightroom 2 differ from Adobe Bridge?
Adobe Bridge is an essential image tool for web, print, and dynamic media designers; videographers; animators; scientists; fine artists; and numerous other industries around the globe. It is literally the bridge between the applications in Adobe Creative Suite®, enabling files to be quickly moved through varied workflows. Professionals use Adobe Bridge to browse files and pass them through many applications — from Photoshop and Illustrator® to InDesign® and Acrobat®, or to Flash® and Dreamweaver® or After Effects® and Adobe Premiere® Pro.
Because Adobe Bridge plays such a vital role for many different professions, it includes several features that are not specifically targeted at photographers. This complexity may be essential for the designer or post-production artist, but for photographers, Lightroom cuts to the core, without compromising power, flexibility, or quality. Because it has been created with the input of working photographers (including commercial, portrait, wedding, and fine art photographers; photojournalists; and others), Lightroom targets the most important and time-critical tasks to make them as efficient as possible.
One of the fundamental differences between Adobe Bridge and Lightroom is the way each application stores information about images. Adobe Bridge is a file browser, which navigates folders on a local drive and displays the contents. Photographers, however, often need to reference files stored on removable media such as a DVD or remote hard drive. While Adobe Bridge is incapable of displaying these offline files, Lightroom takes an extended view beyond the local disk — it can work with offline files because it is catalog-driven. Importing photographs to Lightroom is the method by which new images are added to its catalog. Photographic files do not need to be moved or copied when they are imported — the Lightroom catalog keeps track of where the originals are located, whether they are on your local hard drive or not.
The Lightroom catalog model also speeds the access to information, creating lightning-fast searches based on standard EXIF and IPTC metadata or simple keywords. And just as your photographs don't need to be stored on your local hard drive, neither does your Lightroom data. Multiple catalogs can be created, whether they are for individual clients and projects, or for students and their corresponding assignments, and they can be located on a local or removable drive for portability and security. Finally, the Lightroom catalog keeps track of information such as virtual copies; collections of images; editing history and snapshots; and slide show, print, and web templates — information that would be difficult to efficiently store otherwise.
Does Photoshop Lightroom 2 replace Adobe Bridge or Camera Raw?
For some, it might. Having an interface that is 100% tuned to the photography workflow and some additional unique features may mean some people will use Lightroom instead of Bridge. On the other hand, some photographers will need or want the broad capabilities of Adobe Bridge — such as integration with Adobe Creative Suite 4; the ability to preview PDF, InDesign, and Illustrator documents; and workgroup management tools. So many users will continue to use Adobe Bridge as well.
How does Lightroom 2 work with Adobe Camera Raw?
If you work with photographs in Photoshop CS4 or Adobe Bridge, you use Camera Raw to achieve the same kinds of editing as you would in Lightroom. In fact, Lightroom uses the same underlying processing engine as Camera Raw, which delivers consistent and compatible results across Adobe applications. Adobe understands that individual photographers work in many different ways. We are committed to providing customers not only with the choice of which software to use, but also with the ability to use multiple applications together as needed.
Where the Camera Raw implementation in Adobe Bridge or Photoshop has the same functions as Lightroom, you will find virtually identical options and sliders. That means you can move back and forth without confusion or the need for extra learning. Where Lightroom contains additional enhancements to raw processing, the enhancements you make will be recognized when the photo file is opened in Camera Raw. A typical example is the Targeted Adjustment tool that is exclusive to Lightroom.
Are there special requirements to make sure editing in Lightroom 2 is recognized by Camera Raw in Photoshop and Adobe Bridge?
Lightroom and Photoshop Camera Raw share the same image processing technology to ensure consistent and compatible results across applications that support raw processing. These applications include Photoshop CS4, Photoshop Elements 6.0 for Mac, Photoshop Elements 6.0, and Premiere Elements 4.0 for Windows®.
Photoshop Camera Raw 5Adobe applications must be updated with the Camera Raw 5 plug-in to ensure compatibility with Lightroom 2 Develop module settings. Photoshop CS4 users can update the Camera Raw plug-in automatically using the Update tool listed under the Help menu. The Camera Raw 5 plug-in can also be downloaded and installed manually by visiting the
Camera Raw file support page. Follow the installation instructions carefully.
Sharing Lightroom settings with Camera Raw 5By default, Lightroom's Develop module settings are stored in the Lightroom catalog. To ensure that Lightroom develop settings can be viewed by Camera Raw 5, the settings must be written to the XMP metadata block for that file. This metadata is stored in an XMP sidecar file (Imagename.xmp) in the current image directory of proprietary raw files or stored directly within DNG files. To update images with the latest Develop settings, choose the Library module and select the group of target images. Choose the shortcut Command (Ctrl + S) to save the settings to the XMP metadata block.
Sidecar XMP files are only required when moving photo files back and forth between Lightroom and Adobe Bridge or Photoshop CS4 for use in Camera Raw. If you prefer, you can simply wait until the files need to be moved to Bridge or Photoshop, and only then select the photos in the Library module in Lightroom, and then choose Metadata > XMP > Export XMP Metadata To Files.
Viewing Lightroom settings in Camera Raw 5Before working in conjunction with Lightroom and Camera Raw, please set the Camera Raw preference to save image settings in sidecar XMP files. By default, Camera Raw will display the image adjustments exactly as performed in the Lightroom Develop module.
Will my raw images look the same in Adobe Camera Raw and Photoshop Lightroom 2?
Yes. Photoshop Lightroom 2 leverages the same core Adobe Camera Raw technology used in Photoshop CS4. This means that not only will raw images look the same in either application, but also that changes you make in Lightroom can appear in Camera Raw and vice versa. To complete this interactivity, changes in both Camera Raw and Lightroom need to be written to XMP metadata. This is so that each software application can recognize the other's edits. This functionality is set in the preferences in each product.
Will Lightroom 2 recognize adjustments to photos made in earlier versions of Adobe Camera Raw?
Raw files edited by previous versions of Camera Raw will maintain their previous appearance when imported to Lightroom. For Lightroom to respect the previous edit, those files must have been edited with the preference set to save image settings in sidecar XMP files. Files edited in Camera Raw after being imported to Lightroom can be updated in Lightroom by choosing Metadata > Read Metadata From Files. Note that this menu option is only available from the Library.
How are the different versions of my photographs stored when I edit them with Photoshop Lightroom 2?
Photoshop Lightroom 2 is a completely nondestructive editing environment because, in fact, your photographs are never changed. Instead, the changes you make to your photographs are stored in metadata as a series of instructions. Whether you are viewing them onscreen, creating a web gallery, or making prints, Lightroom is simply applying those instructions to the original, untouched photo file. This enables the photographer complete flexibility, control, and creative exploration, with the knowledge that any change applied to an image is 100% reversible at any time — today, tomorrow, or years in the future.
Are the features the same in the Windows and Mac OS versions?
Yes. Photoshop Lightroom 2 contains the same features and delivers the same professional, best-of-class results, no matter which platform you choose to use.

Does Photoshop Lightroom 2 run on Windows Vista?
Yes. Photoshop Lightroom 2 is designed to run on both Windows XP and Windows Vista®.
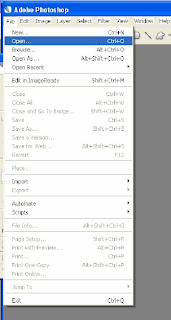
How to open a file in Photoshop

You can open files using the Open command and Open Recent command in the File menu.. In Photoshop, you can also open files using Adobe Bridge.
Sometim
es Photoshop may not be able to determine the correct format for a file. This can happen, for example, because the file has been transferred between two operating systems. Sometimes a transfer between Mac OS and Windows can cause the file format to be mislabeled. In such cases, you must specify the correct format in which to open the file.

Note: Photoshop and ImageReady use plug in modules to open and import many file formats. If a file format does not appear in the Open dialog box or in the File > Import submenu, you may need to install the format’s plug in module.
To open camera raw images in Photoshop
You can open one or more camera raw image files directly in Photoshop without opening the Camera Raw dialog box. Photoshop apples either the default camera raw image settings or your adjusted settings.
In Bridge, do one of the following:
Select one or more camera raw image files, hold down the Shift key, and choose
File > Open.
Hold down the Shift key and double-click a camera raw image file
.

Thursday, December 11, 2008

How to use Adobe Bridge

If you have Adobe Photoshop installed, you can open and edit camera raw files from Bridge and save them in a Photoshop-compatible format. You can edit the image settings directly in the Camera Raw dialog box without starting Photoshop. If you don’t have Photoshop installed, you can still preview the camera raw files in Bridge
To start and quit Bridge, and to return to an application
Do any of the following:
To open Bridge from an application, choose File > Browse from your application.
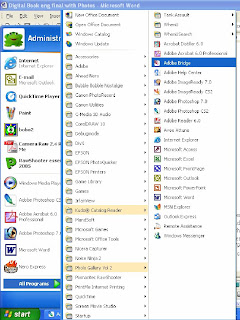
(Windows) To open Bridge directly, choose Adobe Bridge from the Start menu.
(Mac OS) To open Bridge directly, double-click the Adobe Bridge icon . By default, this is located in the Applications/Adobe Bridge folder.
To quit Bridge, choose File > Exit (Windows) or Bridge > Quit Bridge (Mac OS).
To return to the last open application that started Bridge, choose File > Return To [Application].

How To view file and folder thumbnails in Bridge?
The content area of Bridge display
s thumbnails of the files and folders of the selected folder, along with information about them (depending on your view).
You can specify how you want files and folders are displayed in the content area; for instance, you can decide how big thumbnails should be, how they should appear, and whether file information should be displayed.
Do any of the following:
Drag the Thumbnail slider at the bottom of the Bridge window to adjust the size of thumbnails. You can also click the buttons at either side of the Thumbnail slider to minimize or maximize the thumbnails.
Click the Thumbnail View button at the bottom of the Bridge window or choose View > As Thumbnails to display items in a grid.
Click the Filmstrip View button or choose View > As Filmstrip to display thumbnails in a scrolling list along with an extra-large thumbnail of the currently selected item. Click the Back button or Forward button directly below the extra-large thumbnail to go to the previous or next thumbnail. Click the Switch Filmstrip Orientation button to change from a horizontal slide show to a vertical one. Note that you can page through a PDF preview in Filmstrip view.
Click the Details View button or choose View > As Details to display a scrollable list of thumbnails along with information about the selected file, such as its creation date, file type, pixel size, and file size. For Version Cue files, there is additional information about the number of versions or alternates as well as enhanced status information along with the current version comment.
Click the Versions And Alternates View button or choose View > As Versions And Alternates to display a scrollable list of thumbnails along with thumbnails of any Version Cue alternates and versions for each item. (Only the current file appears unless you have created an alternates group containing the file or created previous versions of the file.) Click Alternates View or Versions View at the top right of the content area to display thumbnails of alternates or versions. In Alternates View, you can also create alternates groups containing files that are not in the current folder.
Choose View > Show Thumbnail Only to view thumbnails without any text information listed. However, Version Cue tool tips still display Version Cue information when you position the pointer over the thumbnail.
Choose View > Slideshow to view thumbnails as a slide show that takes over the entire screen. This is a quick and easy way to display and work with large versions of all the graphics files in a folder. Instructions on how to use the slide show are displayed on the screen when you choose this command.
Depending on the view you’re in, you can display extra file information by positioning the pointer over a thumbnail in the content area. For files in Version Cue projects, you can also choose File > Versions or File Alternate. This command opens a dialog box that lets you work with the file’s versions or alternates without having to select that view in the Bridge content area.

Tuesday, December 9, 2008

Photoshop For Photographers

In a traditional darkroom, you control images with choices of films, chemicals, papers and processes. In the digital equivalent of the darkroom, you do so with a computer system and a photo-editing program. Just as in a traditional darkroom, the quality of your digital tools has an impact on the quality of your images.
However, a digital darkroom isn't like a traditional darkroom. For one thing, the lights are on. For another there is no prep time, so you can work only as long as you want. Costs are also lower because you can experiment and try things without wasting time and materials. If you make any really serious mistakes, you can always use the undo command.
Digital images can be edited in a wide variety of ways using photo-editing software. In some cases an editing program is used to "improve" an image by eliminating or reducing its flaws. In other cases it is used to take an image to a new place, making it something it never was.
The term computer graphics refers particularly to images displayed on a video display screen or Monitor. A computer-graphics system basically consists of a computer to store and manipulate images, a display screen (Monitor), various input and output devices, and a graphics software package—i.e., a program that enables a computer to process graphic images by means of mathematical language. These programs enable the computer to draw, colour, shade, and manipulate the images.
Graphics software programs enable a user to draw, colour, shade, and manipulate an image on a display screen with commands input by a keyboard. A picture can be drawn or redrawn onto the screen with the use of a mouse, a pressure-sensitive tablet, or a light pen. Preexisting images on paper can be scanned into the computer through the use of scanners, digitizers, or digital cameras. Frames of images on videotape can also be entered into a computer; Manipulated image can be printed on paper or on photographic film.
Pictures are stored and processed in a computer’s by either of two methods: Raster graphics and Vector graphics. Raster-type graphics maintain an image as a matrix of independently controlled dots or Pixels (picture Elements), while vector graphics maintain it as a collection of points, lines, and arcs. Raster graphics are now the dominant computer graphics technology.

ADOBE’S PHOTOSHOP
Adobe Photoshop is, without a doubt, one of the most exciting and versatile image creation and manipulation applications available. For anyone who deals with images -- from print media designers who come up with those dazzling ads in magazines, to Web creators sculpting awesome sites with cutting-edge graphics, Studio owners who want to restore damaged Photographs of their customers-- Photoshop is the tool of choice.
Basic Concepts
Photoshop is an extremely versatile tool: you can use it to correct errors in photos, to add effects to images, or to build complex images from scratch. Welcome to the basic concept section of Photoshop! Now we shall learn something very basic about work area, tools, menus & environment of Photoshop. Those who are familiar with Photoshop can skip this page. But if you are beginner, you better try this section to feel comfortable for further tutorials.
Adobe Photoshop Basics Outline
Before going for tutorials it is advisable to get familiar with the way Photoshop works. Photoshop is a raster program and an image processing package. This package deals lot with colors and selections. You must be well aware with the desktop of the package and the menus provided. Some Menus will come up with submenus and they provide more advance commands which requires proper practice to master. The tools and the potential of each tool of Photoshop have to be understood. After this get familiar with different types of Palettes, this explores endless way to creativity.
Desktop
It is essential to know about the environment we are working with when we study any package. When you open Photoshop 6.0 you we see some change if you are familiar with Photoshop 5.5. The work area is different. This is the tour of Photoshop 6.0 work area.Unless specified otherwise, Following lessons are applicable to Photoshop Version 5.0 and higher. When information in a lesson does not apply to all of these versions, notes will be provided for each version where applicable.
Navigating the Workspace of Photoshop
Let's get started by exploring the basic elements of the Photoshop workspace. There are four main counterparts to the Photoshop workspace

The Menu Bar
The Tools Option Bar
The Status Bar

The Toolbox
the Pallete

At the left side of your desktop you will find Toolbox. All the amazing tools you will be using throughout these tutorials are situated here.
Menu Bar
The top part is a menu bar where you will find general menus like File, Edit, Image, Layer, Select, Filter, View, Window and Help.
Tool Option Bar
Below menu bar, the newly introduced Tool Option Bar is placed. This When you are using any tool, the options related with that tool will be displayed on Tool Option Bar and can be directly accessed from there.
Palettes
Towards extreme right, you will find rectangular boxes called palettes. It can be dragged out from original box. Palettes have wide range from Navigator to Layers and Channels.
Status Bar
At the bottom of the desktop, like any package Photoshop also has status bar.

Menu Bar:

Menus With the revolution of graphic user interface every package is well equipped with menus so we don't have to remember the commands. There are some standard menus you will find in all the packages, like File, Edit etc. Some common sub menus are Cut, Copy, Paste selects all etc. Photoshop is an image-processing package hence it comes with its own menus used for image processing. We are giving brief description of the main menus used in photoshop.
File
You will find this menu in almost all the package. This consists of commands related with the general working of the package. In photoshop it consists of New, Open, Save, Save as, Place, Print, exit etc.
Edit
This is another standard menu of any software generally contains commands related with Cut, Copy, Paste, Clear. Photoshop provides more specific commands like Fill, Stroke, Color Settings, Preferences etc. along with general commands.
Image
Layers are photoshop specialty .You can use up to 100 layers depending upon the memory of your computer & size of your imageThis menu can be called as a backbone of photoshop if you consider it only image processing package. Most of the advance commands are situated here. The ground level tasks like changing mode, resolutions can be done through image menu.
Layers
Photoshop specialties! This easy to use feature made photoshop a very powerful image processing tool. Layers can be considered as transparent sheet on which we can process different parts of image. Layers can be edited separately and can be merged at the end.

Select
As we have already stated, selection is very important in any raster programs, select menu provides different ways of selections. Interestingly you can even save the selection for later use using save selection command. The range of the selection can be change with this menu.
Filter
Most interesting part for the photographers is Filter menu of Photoshop. They can Produce oil colour ,Soft Focus or Solarisation effect .As you proceed further this part becomes more serious. Most of the effects are carried out in the photoshop using standard filters provided by the package. You can use third party filters also.
View
This menu is used for easy and more efficient working. Different views help you to have better idea of your artwork. Besides, view menu provides some toggles between rulers, grids etc.
Windows
Mostly used for toggle purpose. I.e. for on and off of palettes, status bar etc.
Help
Provides you help features of Photoshop. In addition to the menu bar, Photoshop often has context sensitive menus for accessing some of the most likely commands depending on which tool is selected and where you click. You access the context sensitive menu by right clicking in Windows, or pressing the Control key on a Macintosh.
The Status Bar
Let's continue our exploration of the Photoshop workspace. There are four main counterparts to the Photoshop workspace: the Menu bar, the Status bar, the Toolbox, and the Palettes. We looked at the menu bars in the first section. In this lesson we’ll be learning about the status bar.
The Status Bar
Now take a look at the status bar along the bottom edge of the Photoshop workspace. The status bar is often taken for granted or overlooked entirely, but it can be a valuable tool, which shows document size, brief description about the tool you are using and view in percentage of the image. You’ll need an open document before the status bar will display any information.
Next in the status bar, you can see useful information about the tool you have selected. If you still have the zoom tool selected, your status bar should say "Zoom In" if you are outside of the document area. Move the cursor into the document area and you will see the status bar display instructions for using that tool.
The Toolbox
Let's continue our exploration of the Photoshop workspace. There are four main counterparts to the Photoshop workspace: the menu bar, the status bar, the toolbox, and the palettes. We've already covered the menu bar and the status bar. In this lesson we'll be learning about the toolbox. Since this is a general overview of the toolbox, the materials here are useful for any version of Photoshop.

When you look at the toolbox, notice how some of the buttons have a tiny arrow in the lower right corner. This arrow indicates that other tools are hidden under that tool. To access the other tools, click and hold down on a button and the other tools will pop out. Try this now by clicking on the rectangle marquee tool and changing to the elliptical marquee tool. The hidden marquee tools are shown here.
Now hold your cursor over one of the buttons and you should see a tool tip appear that tells you the name of the tool and its keyboard shortcut. All the marquee tools have a shortcut of M.

Photoshop Toolbar

Selection Tools
When you work with any raster based package, selection is always important factor as it is generally based on pixels. In vector programs we have the habit of click and select hence shifting from vector to raster makes little uneasy in the beginning for many beginners when it comes to selection. But with some practice it becomes not only easy but a very interesting activity. Selection Tools always work with closed border.
Powerful & user-friendly selection tools evaluate any Photo editing programme.

Rectangular Marquee Tool (M)
This is the first tool available in Photoshop for rectangular selection. Just drag it over the image and the rectangular part of the image will get marked with dotted line. This part is considered as Selected.

Elliptical Marquee Tool (M)
This is similar to previous tool. It selects elliptical area.

Lasso Tool (L)
This is different type of selection which enables you to draw freehand border around the area of the image you desire and select it.

Polygonal Lasso Tool (L)
Similar to Lasso but it is straight edged tool. I.e. You get straight line border as selection between two clicks.

Magnetic Lasso Tool (L)
One more interesting feature of Photoshop. It snaps the strong edged of the image and create the border. If you are using contrast colors in the image, this selection is always advisable.

Magic Wand Tool (W)
It's a pixel based selection. You don't have to trace the outline of the image like Lasso or Marquee tools. Magic Wand lets you to select the area of similar color. Clicking on the Add To Selection icon allows you to make more than one selection (see above). To remove part of your selection click on the Subtract From Selection icon and using the lasso to draw the part you want to subtract from the selection.
Tip Use the zoom tool to magnify your image while you are making your selections. You may find it much easier to work this way.
Choosing Feather will soften the edges of the selection of the lasso tools. The value of the feather will depend on your image size but generally 2-3 pixels will be sufficient.

Move Tool (V)
It is used to move the selections basically. It is also used to move guides and Layers. If you select some object or the part of the image it can be moved only with the move tool. If you use just the same selection tool then only selection border will move.

Crop Tool (C)
Want to trim the part of the image? Want to remove undesired part? Here is a tool. Crop tool actually trims the desired part of the image.

Airbrush Tool (J)
Start painting! Air brush let you paint the image with soft edges. The type of brushes can be changed.

Paintbrush Tool (B)

It is similar to paint bush strokes. Again the brush type can be changed.

Pencil Tool (B)

It has the hard edge like pencil. It simply works like pencil.

Clone Stamp Tool (S)

Need to make duplicates? Replicas ? Want to add more fruits in the dish? Here is the tool. It exactly copies image or the desired part of image in the file.

Pattern Stamp Tool (S)

It paints the area with the pattern.History Brush Tool (Y) Back to past! This amazing tool paints the copy of the selected state or the snapshot in the file.

Art History Brush (Y)
This also copies the selected state or the snapshot but it adds more flavors with stylized strokes.
Eraser Tool (E)
Remember School days with rubber eraser! It erases the pixels.
Background Eraser Tool (E)

This tool lets you to erase background and creates transparency.

Magic Eraser Tool (E)
This magical tool erases similar pixels to transparency.
Gradient Tool (G)
Creates color blends of different types. Even rainbow!Paint Bucket Tool (G)Fills the color in the area containing similar color pixels.

Blur Tool (R)

As a name indicates, it blurs, hard edges in the image.

Sharpen Tool (R)

As a name indicates, it sharpens, soft edges in the image.

Smudge Tool (R)

Have you ever dragged your fingers through wet paint and made mess? As a name indicates, it smudges.

Dodge Tool (O)

It’s too dark! Make it light with this tool.

Burn Tool (O)

Its too light! Make it dark with this tool.

Sponge Tool (O)

Would you like to change color saturation? Here is the tool.

Type Tool (T)

Without text you won't be happy! Type the text over an image with type tool.

Pen Tool (P)

Draw path with pen tool.

Eyedropper Tool (I)
If you want to use the color from image itself use eyedropper to pick the color from image. In practical use the colour sampler can be used to sample a colour and then that colour used for the repair.
Hand Tool (H)

Moves the image as if you are moving it by your own hand within its window.

Zoom Tool (Z)

Want to check magnified view? Want to reduce the view? Use zoom tool.

Moving down in the toolbox, we come to the color swatches. This is where the foreground and background colors are displayed. The tiny arrow to the top right allows you to swap foreground and background colors. The tiny black and white swatch symbol to the lower left allows you to reset the colors to the default of black foreground and white background. Hold your cursor over those two areas to learn the keyboard shortcuts. To change a color, simply click on either the foreground or background color swatch and select a new color in the color picker. Experiment by changing the foreground and background colors and then resetting them back to defaults.
The next two buttons on the toolbox allow you to toggle between quick mask and selection mode. We'll learn more about this later in future lessons.
Below that you have a set of three buttons that allow you to change the appearance of the workspace. Hold your cursor over each button to see what it does. Notice the keyboard shortcut for all three is F. Hitting F repeatedly toggles between all three modes. Try it now.
Palettes
These are small rectangular power packed boxes initially situated at the right side on the desktop of Photoshop. You can decide, control and create many parameters with the help of palettes. The hide and show pallets can be found in window menu. In this section we are giving brief information of the palettes.
Layers

Here you will create layers. The transparent sheets which are used to edit different parts of the image. You can even use layers to make the changes in the image without affecting the original image. Layer palette comes up with many useful options e.g. Create, copy, delete layer. You can merge the layers as well. Layer mode is another feature to trigger your creativity. Besides this there are some advance options like group with previous etc. Layers give you the freedom to work the way you want.
Channels
They Store color information. Channels can be used to create complicated selections using quick mask mode. That's the way alpha channel works! Different type of effects can be achieved through channels.
Path

Basically used for drawing. The path can be converted into selections. You can also stroke path.
Action

This palette used to save the command and reuse then on the image to automate the task.

History

This acts as famous undo. You can go back to past and start again from the step you want.


Palette

used to edit the text you place in the file.ParagraphIt is used to format paragraph.
Color

Work with colors. Use different color models. This is used to create desired color. The palette provides color bar which can be used to select foreground as well as background colors.

Styles

This is used to apply layer style on the object. You can use predefined style or you can create your own style.
Swatches

It is used to select the color. You can make your own library by adding different colors.

Navigator

This palette is used to navigate the views of the image in photoshop. With the help of slider you can change the view the image.
Info

As a name indicates it displays the information. Suppose you move the pointer over an image it will provide you information about colors. The display of the information changes according to different tools.

Wednesday, December 3, 2008

FIP Convention 2008

Dear Readers,
I am going to FIP Convention 2008 as Faculty of advance Digital Photography , so this blog will not be updated till 08.12.2008. Sorry. I am giving below the detailes of FIP Convention you can meet me their.........................Rajendra


24th. FIP Convention 2008
(Dedicated to KR Sukhdeo Singh)
5th to 8th December, 2008 at Lucknow
Host: Lucknow Camera Club


For attending it contact:
Mr Anil Risal Singh
Mob-09415464566

Saturday, November 29, 2008

SETTING UP YOUR OWN DIGITAL DARKROOM

Since all post editing in film-photography is done in the darkroom, the post editing of digital photographs (on PC) is also called the digital darkroom. The concept of a "digital darkroom" is a very hot idea in photography today. However, a digital darkroom isn't like a traditional darkroom for one thing, the lights are on. The appeal is also justified. Like Traditional photographers and their traditional darkrooms, today's digital photographer has the same desire to create, control, and manipulate their own prints. As the quality of inkjet prints now rivals that of traditional prints, it has now become possible for photographers to set up a high quality digital darkroom at home.
Setting up a home digital darkroom doesn't have to be complicated or expensive. It does involve a number of decisions and careful planning.In a traditional darkroom, you control images with choices of films, chemicals, papers and processes. In the digital equivalent of the darkroom, you do so with a computer system and a photo-editing program. Today's personal computers are capable of bringing digital imaging to the general public. However, it’s not just for creating and storing photos anymore, but also for editing images. In fact, in your computer you can build a darkroom with every function of a standard chemical darkroom. The advantage? A digital darkroom is easier to use, safer and offers faster results than its chemical counterpart
In past owning a 35mm camera didn't imply that you had a darkroom in the basement. Only serious amateurs photographer who dared to play with the toxic chemicals, noxious smells, and complicated procedures that needed to develop and edit one's own photos have their own darkroom. These days, though, most digital photographers do their own editing and printing--it's easy and fun. But what tools do you need to really make a go of digital photo editing and printing? That's what we're here to find out?
Assembling your own digital darkroom isn't complicated or expensive. You can tailor the equipment to your specific applications and budget. You can spend less or more, it all depends on what you're trying to accomplish, and the size of your budget. How? There are numerous configurations and setups possible. This article serves as a simple guide and tool for designing and building your own digital darkroom.
Choose Your Computer
The computer is the heart of the digital darkroom. The good news is that unless you're planning to output prints significantly larger than 8x10, chances are your existing computer will be good enough. In fact, unless you've got money to burn, it's best to work on your existing computer.However, if you're thinking of building a darkroom setup from scratch, there are a number of decisions to be made. PC or Mac
The fact is that either system is fully capable of delivering excellent output. So, unless you've got a valid reason to choose one platform over another, stick to the operating system you are most comfortable working in. Some points may be considered such as the Color management is far more stable and mature on the Mac platform. If excellent color management is a must you cannot go wrong with the Mac. However, note that true color management requires additional hardware and software that isn't cheap. PCs are cheaper and the supply and range of peripherals and software is considerably greater today.
Hardware Specifications
Once you've decided on which O/S you want to use, you'll have to decide what specifications you want for your CPU. There are a number of key areas to consider:
Processor
Faster is better, but you don't have to lose your mind about it. Processor power is usually measured in terms of MHz. Adobe's Photoshop requires only a Pentium or faster Intel Processor for the Windows version, and any PowerPC-based Macintosh for the Mac OS version. I'm running the Photoshop 7.0 on a 500MHz Cyrix-powered Pc, with no ill effects. Would I like more power? Yes, but the temptation has no end. So buy the fastest processor you can afford.
Memory
RAM is the amount of memory that your computer holds on and juggles while doing its Computation. You can never have too much RAM, so get as much as you can afford. Even for the least expensive system, I urge you to get a minimum of 128MB of RAM, preferably 256MB. Photoshop requires only 32MB of RAM to work but more the RAM faster the work. If you're hesitant about buying a new computer, adding RAM is a good way of making up for slightly slower processors like Pentium II, III or older-type PowerMacs.
Hard drive
The 15 GB hard disks included with my old systems is more than adequate to accommodate a digital darkroom, but more space is always useful. Today 40/80gb hard disks are common. For still photography, you can stick to the more standard hard drive interfaces-ATAPI. Forget about SCSI, you won't really need it. It's also easy to add another drive to your old machine, if you need to beef it up.
THE MONITOR
Go for Larger displays from recognized manufacturers because that will give you better results. A larger display allow you to better see on the screen what you'll get in a printout. They also support a wider range of resolutions.
Dot Pitch
All CRT displays use an electron beam that scans the screen which is covered with dots of colored phosphor. Between the electron gun and the screen is a mask that allows the sweeping beam to strike the screen only in selected areas (pixels). There are two kinds of masks; shadow masks and slot masks.
A shadow mask is a screen drilled with holes. The closer these holes are together in this screen, the higher the screen's resolution.
A slot mask (or aperture grill), like those in Sony Trinitron tubes, uses slots cut in the plate instead of round holes.
The spacing between the center of one dot or slot of the same color is called the dot pitch and is given in millimeters. The closer these are together, the better the screen's display (all other things being equal). The images are crisper and edges and lines look smoother. To compare monitors with the different types of masks, you need to know that the numbers are not equivalent. For example, a monitor using a shadow mask and having a dot pitch of .27mm is about the same as a .25 mm dot pitch on a monitor using a slot mask. You can determine a monitor's maximum resolution by dividing its width by its dot pitch. For example, a 14", .28mm dot pitch monitor measuring 300mm across could clearly display 1071 dots.
Dot pitch isn't a reliable measure of monitor quality because it's often distorted by different measurement techniques. Some monitors, such as the Sony Trinitron, use stripes instead of dots so there is no comparable measurement.
Resolution
On any given monitor, changing screen resolutions changes the size of displayed objects such as icons, text, buttons, and images. As the resolution increases, object sizes decrease but they do appear sharper. Take a look here at the same image displayed at three different resolutions: 640 x 480, 600 x 800, and 1024 x 768.
Because higher resolutions make things smaller on the screen, not all screen resolutions on a given sized screen make for comfortable viewing. For example, a screen resolution of 1024 x 768 on a 14" monitor makes text too small to be easily read. On the other hand, using a resolution of 640 x 480 on a 21" monitor makes things unreasonably large for hose with normal vision (but like a large-print edition for folks with vision problems).
White Point
Light sources have different color temperatures. When you set up your monitor, you can adjust its "white point" which is another name for its color temperature. The monitor's white point has a big effect on how the image looks on the screen. It's best to match it to the way you'll finally output the image so you can preview the end results better. If your images will be displayed on a monitor set it to 9300K, and if they are to be displayed on a TV set it to 6500. If they are to be printed, set it to 5000.
Source Color
Temperature
Computer monitor -9300K (adjustable)
Average daylight -6500K
Television monitor -6500K
Cool white fluorescent -4300K
Tungsten lamp -2800K
Sunlight at sunset -2000K
Gamma Correction
The image sensor in a digital camera is a linear device—the output signal is directly proportional to the scene illumination and exposure—doubling the exposure doubles the output signal. However, the phosphors that are used to make display monitors are non-linear. Typically, the phosphors have less gain for dark signals and more gain for bright signals. As the input voltage is increased, the screen brightness doesn't change smoothly because it's affected by electrostatic effects in the electron gun. This means that if you input a linear signal, the display on the screen is nonlinear and images tend to be darker with detail lost in the shadow areas.To compensate for this, the monitor adjusts the input signal to boost the dark areas and reduce the light ones. This ensures that combination of camera and monitor working together produce a linear effect. This process of adjusting the incoming signal is called Gamma correction. The term Gamma comes from the fact that the screen's brightness is proportional to the input voltage raised to the power 2.5, or gamma.
To make the displayed image better match the original image, the input signal can be adjusted to distort the signal in the opposite direction from the distortions of the CRT. For example, if the original image has a middle gray tone, the correction lightens it. When it's then displayed on the screen, the CRT darkens it again, bringing it back to middle gray. This adjustment is called gamma correction. Gamma correction controls the overall brightness of an image and images that haven't been properly corrected will look too light or too dark. Varying gamma also affects colors by changing the ratios of red, green, and blue. For this reason, you need to correct it to accurately reproduce colors.
Most monitors have a gamma of about 2.5. In the art below you'll see that a CRT with a gamma of 2.5 has a response like the one shown in the top two charts. In the bottom three charts you see what happens to the output signal when the input signal is first corrected.
Although gamma correction sounds technical, it's important if you want images displayed accurately on your screen or if you want to post images on the Web and have them displayed correctly on other people's screens.
Video Card
This is really for the PC users. You don't really need much; it should have just enough power to display 32bit colors (the limit on PCs) at the optimum resolution for the size of your monitor. In general 32MB of video memory is enough for still digital photography. You must have more video RAM if you're going to use a larger monitor that can utilize higher resolutions.
SCANNER
A scanner will allow you to bring Prints, slides or negatives, either color or B&W into your computer in a matter of minutes. Scanners come in many price ranges. The math when considering resolution of a scanner is easy. If the scanner is capable of 2700ppi then a 10" print will have a resolution of 270ppi. This is sufficient for output that rivals traditional photographic media. 300ppi also happens to be the required resolution for digital light printers. Beware of Optical Vs. Interpolated resolution in scanner specs. The only number that counts is true optical resolution. Each scanner has its own control software that plays an important part in both the quality of scans and ease of use. Scanning software not only provides an interface between the scanner and the computer, it also provides the user with the ability to adjust a wide range of parameters before the image ends-up ready for final processing. Choosing a scanner therefore involves evaluating its bundled software as well as hardware capabilities. The most important features of a negative scanner are bit depth, speed and dynamic range.
Bit depth refers to how a pixel is assigned a color. Some scanners record in 24 bits, or 8 bits per primary color. The greater the bit depth, the more flexibility there will be in editing and reproducing quality photographs.
Speed refers to how long it takes the scanner to scan the negative. If speed is important to you, use the specs as a rough guide, but don't rely on the accuracy of the numbers, because there is no set standard for measuring scan time.
Dynamic Range is a measurement from the least to the greatest. In this case, white is zero and black is four. A dynamic range of 4.0 would mean that the scanner is capable of reading the entire color scale accurately. Most scanners are rated somewhere between 3.0 and 3.6.
CD-R/RW Burners - Yes, you're going to need them. Suppose you have a few years' worth of digital pictures stored on your PC--what happens if its drive fails? Your digital darkroom should have a reliable backup system in place. The least expensive solution is to periodically copy your digital photos to a CD-R using the CD-RW drive. CD-R/RW technology is so mature and affordable that there's really no reason not to have one. These also come in handy when you need to transport image data to service bureaus or wish to send them to loved ones.
Optical Mouse - You're going to need a very good mouse for working in your image manipulation software. I really recommend going optical. They work well, are very precise, I highly recommend.
Ergonomics
One very important issue often ignored in many Digital darkrooms is ergonomics. We aren't accustomed to sitting in front of a computer for long hours. Therefore, it makes sense to be comfortable in order to be more productive. There are several things you must consider when setting up your workstations.
Your monitor should be at or below eye level. Your wrists should be straight with your forearms supported and parallel to the floor. Your thighs should also be parallel to the floor with your feet on the floor or a foot rest.
The proper height for a computer work surface is about 3 or 4 inches lower than the average writing desk. You should adjust your back support of your chair so that the seat back s curve is in curve of the lower back. Your monitor should be directly in front of you. The monitor height should be adjusted so that the top row of characters on the screen is at or slightly below eye height. The monitor should be about at arm's length away from your eyes. Also, keep in mind that good soft lighting is essential,the wall colour of your darkroom should be grey and soft background music can improve your working environment.
Try getting you feet wet and seeing for yourself what the fuss is all about. If you already have a computer why not start experimenting yourself. There are several modestly priced programs available for digital editing, some software are free for trial use and these will allow you to explore this exciting new side of "darkroom" practice. Have fun and don’t be afraid of change.

Friday, November 28, 2008

Adobe Photoshop Cs4 new features

Adobe CS4 New features
Adobe has released CS4 in September 2008. Let us preview some of its cool new features. CS4 now supports 64 bit.
Revolutionary 3D painting and compositing
Now paint directly on 3D models, wrap 2D images around 3D shapes, convert gradient maps to 3D objects, add depth to layers and text, get print-quality output with the new ray-tracing rendering engine, and enjoy exporting to supported common 3D formats.It also supports 3D Lenticular Imaging. Lenticular printing is a technology in which a lenticular lens is used to produce images with an illusion of depth, or the ability to change or move as the image is viewed from different angles. Adobe Photoshop CS4 Extended now supports the creation, and printing, of 3D lenticular images. However, it will currently only support 3D effects and not flip animation.
Adjustments panel
CS4 Simplify image adjustment by easily accessing every tool you need to nondestructively adjust and enhance the color and tone of your images; on-image controls and a wide variety of presets are also included in the new live and dynamic Adjustments panel
Masks panel
Quickly create and edit masks from the new Masks panel. This panel offers all the tools you need to create editable pixel- and vector-based masks, adjust mask density and feathering, easily select noncontiguous objects, and more.
Fluid canvas rotation

Now just click to smoothly turn your canvas for distortion-free viewing at any desired angle — no more tilting your head in the middle of painting and drawing.
Smoother panning and zooming
Gracefully navigate to any area of an image with new, ultra-smooth zooming and panning. Maintain clarity as you zoom to individual pixels and easily edit at the highest magnification with the new Pixel Grid
Extended depth of field
Easily create a single image from a series of shots that have different focal points with the enhanced Auto-Blend Layers command, which smoothly blends color and shading and now extends your depth of field, automatically correcting vignettes and lens distortion.
Auto-alignment of layers
Create accurate composites with the enhanced Auto-Align Layers command. Move, rotate, or warp layers to align them more accurately than ever before. Or use spherical alignment to create breathtaking panoramas.This feature was already in CS but it has been enhanced in CS4.

Thursday, November 27, 2008

Workshop by IIPC

26th Annual
International Workshop & Conference
DEDICATED TO YOUSUF KRASH
December 26th -29th 2008
Organized By:
INDIA INTERNATIONAL PHOTOGRAPHIC COUNCIL
In Collaboration with
DEPARTMENT OF PHOTOGRAPHY, UNIVERSITY OF ALLAHABAD
WORKSHOPS ON:
PORTRAITURE, FASHION, PRODUCT & TABLE TOP , DIGITAL, VIDEO, OUTDOOR FASHION AT SANGAM AND PHOTOJOURNALISM

For queries contact:
Mr B. B. Singh -09415235281
Workshop coordinator
Email: himanshu640@gmail.com

Photoshop For Photographers

It seems as though the whole world is going digital. In music world Black Vinyl LP was first replaced by cassettes and then CD/DVD has completely replaced them. Digital TV are already in market and several channels are already broadcasting in digital format. And now you see that photography has also become Digital. It is clear that future technology is digital so if you do not want to be left behind you will have to convert from conventional to digital. According to PSA journal today 60% prize winning photographs in annual competition are digital, which shows how quickly digital photography is rep[lacing the conventional photography.
Due to decrease in price of digital cameras and rapid expansion in popularity a lot of traditional camera users are making a direct leap to digital image processing. For many people darkroom work has its unpleasant aspects, including the isolation and the chemical fumes and dermatological effects. There is a good news for them that they can now also enjoy the pleasures of PC based darkroom, working in a well light, well ventilated space closer to the rest of the family.
A freshly scanned/downloaded image from a scanner or camera is referred to as being raw, even though one might have exercised some control over it during the scanning/shooting process. These include adjusting contrast and brightness, color balance or tonality, sharpening, and cleaning up any dust spots or other unwanted artifacts. The rest processing work is done in a digital darkroom.
In image processing software, all of the controls of the traditional darkroom - brightness, contrast, color balance, burning and dodging are available, but with infinitely more control and ease than you’ve ever had or imagined. One of the most important advantages of working in the digital realm is that adjustments are made with real-time feedback, changes that you make, are instantly displayed on-screen, and are closely akin to what you’ll see on the final print. Most importantly, once made these changes are saved to disk as part of the final image and therefore making subsequent prints is a snap. Depending on the size of image image processing takes anywhere from a few minutes to several hours
Which program is best to accomplish these tasks? For most serious workers the first choice is Adobe Photoshop. This is virtually the de facto standard for image processing software on both PCs and Macs. While it’s expensive, it is without peer in terms of versatility and power.
When photographers switch from the traditional chemical darkroom to PC-based desktop image processing the hardest part of the learning curve is learning Photoshop. This program is one of the most sophisticated pieces of software ever designed and now with 17 years+ of revisions and enhancements presents a daunting challenge to the newcomer
There are numerous third-party books on Photoshop but most are filled with unnecessary and confusing information aimed at non-photographers. Several of the books designed specifically for photographers go into so much depth that figuring out where to begin can be an intimidating at best.
This article is designed with you in mind. You want to take your scanned (or digital camera generated) images and be able to produce high quality prints You want to use all of the quality-enhancing tricks that you know are available to pros and people who¹ve spent years studying Photoshop, but you don't want to waste time getting started.
If you are one of those,You've come to the right place. The following articles details in a step-by-step manner how to take your raw scan or digital file and produce the highest quality print. While some explanations are provided of why certain actions are taken, the main thrust will be results rather than reasons.
RAW Files
If you are working with files from a digital camera they should preferably be in RAW mode. JPG files have been degraded by the camera and the application by the camera of White Balance and Sharpening has done the same (though to a lesser extent). Apply controls once only in Photoshop for best results.

Wednesday, November 26, 2008

HIGH DYNAMIC RANGE IMAGING HDRI

What is High Dynamic Range?
Dynamic Range refers to the range of brightness levels that exists in a particular scene-from darkest-before complete and featureless black to, to lightest-before complete featureless white. A scene showing the interior of a room with a sunlit view outside the window , for instance, will have a dynamic range of approximately 100000:1. So it has a High Dynamic Range. Our eyes are a marvelous piece of instrument which can see both in highlights and shadows simultaneously even when the dynamic range is as high as 10000:1. But unfortunately the dynamic range which can be handled by a slide film, CCD or CMOS is only six f/spots from the brightest to darkest point, while colour negative and black and white film users always had a few more stops to play with so the dynamic range of a film/transparency, CCD or CMOS is called low dynamic range .
Contrary to popular opinion-what you see is not what you always get in a photograph. You may be able to see the details in those dark shadows and bright highlights when the sun is shining because our eyes have high dynamic range-but your, negative/Slide film /CCD or CMOS sensor can not because they have low dynamic range . If the dynamic range of the scene is outside the camera limits, the highlights and shadows will be reproduced without details.
How to capture High Dynamic Range faithfully on film/ slide /CMOS or CCD:
Rendering the scenes presenting very bright highlights and deed shadows is very problematic. The problem already exits with traditional solver halide photography and is more pronounced with slide films. In digital photography, the problem is even worse as the linear response of the sensors imposes an abrupt limit to the dynamic range , sonce the sensor maximum capacity is reached. If you capture details in the shadows by long exposure times, you then get blown-out highlights. Conversely, you can capture details with short exposure times , but you then lose contrast in the shadows.
If you have a SLR or compact camera, the judicious use of a graduated neutral density , split neutral density or polarizing filter or by combining the best bits of two different exposure in the computer much like the dodge & burn technique used by experienced darkroom users, you can achieve equally good result in high contrast scenes. Dynamic Range is one of the limitations that have not yielded much over the years to technology’s inexorable advances but now this problem has been tackled. The Merge to HDR from file/Automatic menu feature of Photoshop CS2 ,allows the photographer to combine a series of bracketed exposures (usually one normal exposure ,and then a few more at 1-2 stops over and under that point) into a single image which encompasses the tonal details of the entire series. High Dynamic Range Imaging (HDRI) enable photographers to record a greater range of tonal detail than a given camera could capture in a single photo. This opens up a whole new set of lighting possibilities which one might have previously avoided-for purely technical reasons.
The use of high dynamic range imaging in computer graphics was pioneered by apul Devevec. Debebee is thought to be the first person to create computer graphic images using HDRI maps to realistically light and animate computer graphic objects. Gregory Ward created the Radiance RGBE image file format in 1985, which was the first and still is the most commonly used file format for HDR imaging today.
File Formats for HDR images:
HDR photographs are 32 bit images (i.e. 96 bit per pixel for a colour image) Unlike 8 /16 bit images which can take a finite no of values, 32 bit images are coded using floating point numbers, which means the point numbers, which means the value they can take is unlimited . There are various formats available to store HDR images , such as Radiance RGBE(hdr), and open EXR9exr) among the most coomonly used . Open EXR is a HDR file format developed by Industrial Light & Magic for use in computer imaging applications.
How to shoot images for HDR?
Most digital cameras are able to capture a limited dynamic range . This is why HDR images are commonly created from photos of the same scene taken under different exposure levels.
Here are some recommendations for taking different exposures for the HDR images.
Mount your camera on tripod.
Set your camera to manual exposure mode, select and appropriate aperture for your scene. (e.g.- f/8 or less if you need more depth of field) and the lowest ISO setting.
Measure the light in the brightest part of your scene(use spot metering and use Av mode and point camera toward highlights) and note the exposure time. Do the same for the darkest shadow of your scene.
Determine the number and value of exposures necessary. For this , take as a basis the exposure time measured for the highlights. Multiply this number by 4 to find the next exposure with a spot spacing of 2EVs are often sufficient to properly cover the dynamic range.
You cane make use of Auto Exposure Bracketing if your camera supports it and if it allows a sufficient exposure increment and number of auto- bracketed frames to cover the dynamic range determined in step-4 . Otherwise ,you will have to vary the exposure times manually.
What is Tone Mapping?
Tone mapping is the process of converting tonal values of an image from a high range to a lower one. For instance , an HDR image with a dynamic range of 100000/1 will be converted into an image with tonal values ranging from just 1 to 255.
You may wonder why someone would want to reduce the tonal range when an HDR image provides so many benefits compared to a low dynamic range. After all, HDR images contain a much higher level of detail and are closer to the range of human vision. The reason is simple: standard display devices whether it is LCD/CRT monitor or paper can only reproduce a range of about 100:1, and paper even less. So, the goal of tone mapping is to map the appearance of the images of higher dynamic range so that they can be reproduced on media such as prints of standard monitors.
When you merge several low dynamic range photographs you get file which is in 32 bit mode. It will have the extension. PBM (portable bit Map). In photoshop you are presented with 4 choices for reducing the dynamic range down to something that you can work with, as follows.
Exposure and Gamma lets you to manually adjust the brightness and contrast of the HDR images.
Highlight compression, compresses the highlight values in HDR images so they fall within the luminance values range of the 8 /16 bits per channel image file. No further adjustments are necessary’ this method is automatic. Click OK to convert the 32 bit per channel image .
Equalize histogram: Compresses the Dynamic Range of the HDR image while trying to preserve some contrast. No further adjustments are necessary; this method is automatic. Click Ok to convert the 32 bit per channel image.
Local Adaptation adjusts the tonality in the HDR image by calculating the amount of local brightness region through the image.
The most versatile and flexible choice among above method is Local Adaptation using the Toning Curve and Histogram.
Software available for creating HDR Images:
There are various software packages around to help you to create HDR photos . These include the following :
Adobe HDR-Supplied as standard with Photoshop CS2 upwards. You can find this option in the menu File>Automate>Merge to HDR.
HDR Shop- an interactive graphical user interface image processing and manipulation system designed to view an manipulate High-Dynamic Range images.
Photomatrix Pro- The Tone Mapping Tool is also available separately as a plug-in computable with Photoshop CS2. This software is more popular than photoshop for HDR imaging due to it’s easy and novel method of tone mapping. It has also tool for removing ghosting effect which comes due to moving objects in image.
Photo genenics HDR is from Indruna Software the first 32 bit per channel HDR paint package.
FDR Tools- a collection of tools supplied as free Basic Version and Advance Version which has also a trial option.
HDR proptograph from one RAW file:
Instead of taking many shots at different exposure there is also a quick rout for obtaining HDR image. Just shoot one Raw file and process it using any Raw converter to create a series of different exposures. For scenes in which there are moving subject this method is best, but the quality of photograph produced by using this method is not as good as shooting different exposures because noise is more apparent in shadow areas .One thing more, if the programme you are going to use to create HDR uses EXIf data you will need to remove this first ,otherwise any changes you make in the RAW processing will be ignored when the program reads the original exposure from EXIF data. When shooting in RAW mode you have to convert the file first. Make sure that the RAW converter setting are the same for each file and save as 16 bit Tiffs or PSDs.
Merging images which include moving objects:
Moving objects produce ghosting effect after merging but now this problem can be solved by using latest version of the software Photomatrix Pro . HDR Soft has released an updated version of Photomatrix Pro . The most notable upgrade is the incorporation of settings to reduce Ghosting artifacts in multiple –source HDR GENERATION . There are two types of Ghost removing settings : moving objects/people and periodic movements, such as rippling water. Both ghosting option can be set to “Normal” or High to attempt to fix moving elements in the combined HDR image.
When to use HDR Images:
I would suggest only using HDR images when the scene’s brightness distribution can no longer be easily blended using a graduated neutral density filter. His is because GND filters extend dynamic range while still maintaining local contrast while trying to broaden the tonal range with HDRI will inevitably comr at the expense of decreased contrast in some tones.


Conclusion:
Over the next decade, the imaging industry will inevitably transition to high dynamic range imaging, creating devices that provide a latitude range for greater than traditional silver halide film. This change will affect all aspect of image making. Today’s camera has an ample resolution. So the next area of product differentiation of camera manufacturers will be the quality of the pixels, rather than number of pixels. This shift has started to happen already. For example, Fuji’s Super CCD S3 Pro Camera has S chip with high and low sensitivity sensors per pixel location to increase dynamic range. For most consumers, HDR will simply mean that the camera records more details in shadows and in highlights. Just as RAW images extend the detail held in digital images, HDR will further increase the available tonal range.Consumers will benefit from the true point –and-shoot ability that broader latitude offers, because HDR cameras will produce usable images from a much wider range of lighting situations. With HDR technologies, photographers can really push the creative envelope, exploring the extremes of high-key and low-key effects. In future professional cameras will offer a multitude of HDR image taking modes. For example, they will automatically blend multiple images taken with the different exposures, with and without flash, possibly using multiple light sources, to produce a single master image. Over the past decade, display companies have steadily improved the dynamic range of LCD and DLP display. Few displays available today indicate where the market is going, new technology wil

Tuesday, November 25, 2008

Interview of Mr Gurdas Dua FIIPC, Hon APASP

Dear Readers,
For you I have Interviewed Mr Gurdas Dua, FIIPC,HPASP of Indore. I hope that you will learn a lot from his interview & photographs. A very gentle person by nature and always ready to help the newcomers. For any clarification or question you can contact him directly. His mobile no is-94250-32922 and - E-mail is: gurdasdua@gmail.com................
enjoy-Rajendra

How did you get started?
Since childhood I had great fascination for Photography, but could not afford to buy a camera till 1988, when I purchased Minolta XG-1 with normal lens. With this camera I joined a local camera club and started learning Pictorial Photography. And I never knew the journey ahead would be so long and so exciting. What equipment you currently use and why.
Do you think expensive equipments are necessary for good photography?
At present I am using Nikon D200 with AF-S Nikkor 18-200mm f3.5-5.6 G ED VR lens.
Expensive is a relative term. To some Nikon D 200 may look costly at the same time to some it may look cheap.
Necessity of expensive camera depends upon the application. If photography is only a hobby, a normal value 6 mega pixel camera is more than sufficient for you. But when photography is a profession, you will need to have high end camera like Nikon D3 or Nikon D700 with 18-200 2.8 lens or a medium or large format digital camera.
Which medium you prefer, B/W, Color Film or Color Transparency and why?
Few years back when I was working on analogue, I was using b/w film, color negative film, color positive (transparency) film as well as Polaroid and was working on all formats.
Small format- Canon T-90
Medium format – Mamiya
Large format- Sinar (With roll film, sheet film and Polaroid backs)
Depending upon the application and use of the image the medium and the format is selected.
You like conventional or Digital phototherapy why?
In present scenario Digital has gone way ahead analogue. Since so many years you may not have heard of any technological improvement or any innovation in film cameras or in any type of film. Whatever advancements and innovations are taking place are in digital only.
Those all camera, film and electronics manufactures who had nothing to do with digital e.g. Sinar, Lieca, Hasselblad, Fuji, Sony have now switched over to digital and every now and then trying to bring some thing new to end users.
So I feel this era has to be completely ruled by Digital Photo therapy.
Have you studied photography anywhere?
Since 1988 when I first picked up my camera and till today I am learning photography and I will be learning it till end of my life. But till now I have not done any formal training course from anywhere.
Can you name few photographers who influenced you or you find that you consciously or unconsciously copy his style?
I have always admired photographers like Ansel Adam, Wellington Lee, Yusuf Karsh and from our own land to name a few O.P. Sharma, C. Rajagopal, T. Kasinath.
Yes I wish to follow their style because they all are great masters, if I can copy just 10 % of their style it will be a great asset to me. But I think it is very difficult to copy any body’s style.
One should do his work with great understanding, enthusiasm, dedication and devotion so that one day his pictures should be recognized with his own style.
How would you rate Indian photographers with their International counterparts?
In current scenario of Photography as an art, many times I find Indian photographers are way ahead of the international photo artists. I think it is because Indian photo artists make images using traditional laws of pictorialism and use esthetics instead of modern trends which most of the international counterparts are now a days following.What are the most important points to consider when you are photographing anything?
1. Originality of the subject matter with a unique concept.
2. Choosing an interesting subject matter.
3. Composition, Background, Lighting.
4. Technique.
5. Presentation.
In this age of automatic cameras do you feel that basic knowledge of photography techniques is necessary for better photography?
What ever camera you use digital or analogue, manual or automatic you must have basic knowledge of photo techniques like relation between aperture and shutter speed, knowledge of depth of field as well as rules of composition and lighting etc.

Photography is your profession or only your hobby?
I started photography as hobby but later on somewhere in 1992 it turned into my profession when I started doing Industrial Photography for Department of Atomic Energy, Govt. of India.
At present I am mainly involved in Pictorial and Advertising Photography.
Pictorial Photography boosts my energy to carry on my profession well.
Which field of photography-Pictorial, Journalism, Nature, Fashion Still life or Advertising you like most and why?
From the core of my heart, I like Pictorial the most because I strongly feel that pictorial is mother of all branches of photography. And let me tell you frankly that whatever I have earned so far i.e. name, fame and money is only because of my practice in pictorial photography.
I also enjoy doing different branches like nature, wildlife, landscape, still life, portraiture, fashion, child, travel, advertising and industrial but always with pictorial approach.
In your view which is your best photograph and why?
It is really difficult to choose the best out of your own best works. It is just like choosing your own best finger out of five.
Every time out of my entire shoot, I select just one or two images, which I feel, are perfect in all regards. So I consider all my final images are my best images because they all are very close to my heart. I would not have made a print or a final image if they were not my best shots.
Besides photography what are your other hobbies ?.
Since last 30 years I am so much involved in photography, that now photography to me is my bread & butter, my entertainment, my duty and my religion. Whatever is related to photography like visiting different beautiful places, different cultures, meeting people and making friends are my other hobbies.
You have got prizes in many competition please let us know about few of them.
· Over 1000 Photographs Exhibited & over 150 Awarded so far in All India and International Exhibitions.
· Represented India in FIAP-KODAK International Photo Contest in 1993 at Belgium.
· Won Nikon International Photo Award '99 (Honorable Mention).
· Won 6th prize in the International AGFA net Photo Contest "Men At work"-2000.
· Won Highly Commended Award by Cannock Photography Society UK for Photograph “Pentomino Bugs Emerging”.
· Won Kodak Action Photographer of the year 2002 Award (Refer Oct. 2002 issue of Better Photography).
· Won Epson Color Imaging Award at Japan in 2004.
· Five times National Award Winner (National Contests organized by Govt. of India).
· Won Nominee Medal for Butterfly Art Foundation International Award.
· Had been member of Indian photographers delegation to Pakistan in March 2006.
Please tell us how and when you got your different honors.
· FIIPC : Fellow of India International Photographic Council, New Delhi, India. [2005]
· Hon. APASP : Hon. Associate of Photographer’s Art Society of Pakistan, Lahore. [2006]
· FBAF : Fellow of Butterfly Art Foundation, Trrisure, Karala, India. [2006]
· India International Photographic Council’s Platinum Grade Exhibitor. [2007]
· Federation of Indian Photography’s Three Star Exhibitor. [2002]
· Pakistan Salon Group of Photography’s Gold Star Exhibitor. [2006]
Have you written any book, discovered any process, then let us know about that?
I have written different articles on photography, few of them have been published in Better Photography and Smart Photography magazines.
· Creativity Through Available Light In Pictorial Photography –April 2000 issue of Better Photography.
· Pictorial lighting _ Basic Lighting issue of Best of Better Photography.
· Kaleidoscope- May 2006 issue of Smart Photography.
· Kaleidoscope- April 2007 issue of Smart Photography.
· Photograph titled ”Scavenger Vultures” published in Dec.-Jan. issue of National Wildlife Magazine, USA.
Tell us about future of photography in India.
In India weather in private, public or government sectors; I don’t think there is any home, office, industry, institution or any project, which does not need photography in their day-to-day operations. That is why all camera and photographic goods manufactures of the world see a great potential of their business in India. Today Photo goods market in India is of Rs.1,700 crores per annum and is increasing every year approximately by 11%. This is in white. Now you can think of the gray market.
So the future of photography in India is very very bright.
What you did or wish to do for budding photographers.
I have conducted many Photographic workshops for budding photographers. Few important ones are:
1998- CCI Indore- C-41 Processing
1999- Focus, Ahmedabad- Industrial, Pictorial, Product with E-6 & C-41 process live demo.
2001- PSJ Jabalpur- E-6 & C-41 Manual Processing.
2004- IIPC New Delhi- Pictorial & Portrait
IIPC Convention Indore- Digital.
2006VPA Vadodara- Pictorial & Studio Portrait
PSJ Jabalpur- Digital, Portrait & Photoshop
2007- Kala Color Lab, Banswara- Digital, Photoshop & Studio Portraits.
25th IIPC International workshop 2007, New Delhi.
2008- Indore Press club-Digital & Adobe Photoshop.
Jodhpur Photographic Society- Portrait, Digital & Photoshop.
Photographic Society of Sagar & Rotary- Digital & Photoshop.
Gopeshwar/ Chamoli (Uttranchal)- Basic Digital and Photoshop.
Is there anything in particular would you like to share with budding photographers?
The budding photographers should first have basic knowledge of camera and it’s working, digital, software like Photoshop and should understand & practice Pictorial Photography.
Without having primary and middle level education one should not jump directly to advanced photography.
There are no short cuts for success!

Photoshop tutorial